Category Archives: Tips and Tricks

Build a Minis Game, Ep. 4 – Combat – MM 45

It’s Mini Monday, where we share miniature projects for your roleplaying and tabletop gaming. This week we’re drawing our daggers and charging into combat! Mini Monday Logo Blades out, everyone! Dagger Lords is a skirmish game, so expect lots of stabby stabbing.

Episode 1: Concept and Theme
Episode 2: Initiative and Turns
Episode 3: Movement
Episode 4: Combat
Episode 5: Powers and Playtesting
Episode 6: Polishing the Game

We’re updating the public Dagger Lords game document as we go, so be sure to check in and see what we have so far. Don’t forget to leave a comment too, because it gets lonely here in the looney bin.

Dagger Lords Minis Game Logo

Sexy Simple Systems

Movement, activation, and combat are all systems. Many games that fall into the tabletop gaming hobby are made up of many different systems, often built around a core mechanic such as rolling dice or drawing cards. Dungeons & Dragons and Pathfinder use the core mechanic of rolling a d20 and adding modifiers to it. Combat, skills, and saves — all separate systems — all use this core mechanic.

As a game designer, you have to balance the number of systems well and reuse the core mechanic wherever you can, otherwise you risk creating a system that’s too complicated. Reusing systems is a great way to keep a game manageable, even as it grows. For example, if my combat system and my magic system are essentially the same, I can spend less time explaining it in the rules and players can jump into those rules with less cognitive effort.

This, by the way, is one reason why I hate objective cards in Warhammer 40,000. Give me a table and make me roll for it, please. And don’t ask me to roll dice in Magic: the Gathering.

Of course, each system covers a different aspect of the game and needs to be tailored to those specific needs. Our goal is to keep things as simple as we possibly can. This is the essence of all design: to find the simplest, most elegant solution to a given problem.

We’re covering hand-to-hand combat today, but you could extend these rules to cover shooting, magic, and other systems, with a little work.

Dice

Choosing which dice to use has a big effect on our game’s mechanics. Die sizes impact the roll ranges, probability of a result, average rolls, and the totals we can expect from a die. For example, rolling 2d6 will give us a result of 7 much more often than a result of 12, while a roll of 1d12 has an equal chance of giving us a 6 or 12. Dice and dice probability is a huge topic that’s worth understanding, so do your own research if you’re serious about game design. We’ll just cover some basics needed for our own game of Dagger Lords.

Certain dice map neatly to percentages. A d10 gives you a range from 10%–100%, in tens. A d20 gives you a range from 5%–100%, going up in fives. Put another way, you have a 5% chance of rolling a nat 20 on a single d20. This gives us a useful benchmark. If we know that most champion boxers land 20% of their punches, then we can map this directly to the dice: hitting requires a 9 or more on a d10 (the probability of getting a 9 or 10 is 20%).

We’ve already got our Reflex Point mechanic and our initiative system, the latter of which includes rolling dice. Previous versions of that system used 2d6 for initiative rolls. Let’s change to ten-sided dice, across the game. This is an important decision because a game is a sum of its parts; the better those parts sync, the better the game will play.

Viking

Developing Hand-to-Hand Combat Rules

Let’s break down combat into its component parts.

Core Mechanic

I do like my d20 systems, it’s true, probably because I spend a lot of time developing rules for d20 games. Stealing from what you know is a good way to start out, so let’s steal from D&D. We can always modify things as we get further into development.

Our core mechanic, then, might look something like this:

Roll = 1d10 + Ability Score + Modifies – Penalties

Abilities

We’ll need to decide on abilities next then. We could simply have a Brawl ability that works for attack and defence. We might want a more complicated system including Brawl, Dodge, Strength, Damage, Armor Penetration, Armor, and so on. Some of these will be tied to weapons, but they still describe the abilities of a single model.

Think of it as a continuum, from super simple on one side to extremely complex on the other. We need to find the best balance of complexity for the game we’re making. Part of this is about knowing your audience and the level of complexity that’s right for them. For a skirmish game, we might choose a level of granularity that’s more complex than a large wargame, which has hundreds of miniatures, and less complex than an RPG, which has a single character per player. If our players are teens, we can ramp up the complexity, while very young players might only handle three abilities, at most.

Tying things back to Reflex Points, we could have the following abilities:

  • Reflex: Determines your reaction speed and ability to dodge. Your starting Reflex Points are based off this ability. Reflex is 2 for our prototype.
  • Brawl: Your ability to fight in hand-to-hand combat, both with and without weapons. We’ll set this to +2 for now.
  • HP: How much damage you can take before you die.

Attacking

To make an attack against an enemy model within 2 inches of your model, you roll 1D10 and add your Brawl modifier. The target rolls 1D10 and adds their Reflex modifier. You can each spend a Reflex Point before you roll to add +2 to the total roll. If you equal or beat the target’s score, you have scored a hit. The target loses 2 HP.

Dagger Lords — Prototype Game: Daggers Out

The objective of this game is to knock your opponent off a pillar. Neither you nor your opponent can move, all you can do is stab at them in an effort to knock them off their perch before they get you off yours.

Setup and Rounds

Each player controls 1 gangster miniature, with the player representing the gang boss. A game has two players. Any miniatures can be used, and for these rules, only close combat weapons are considered because of powerful magic influencing the battlefield. Each mini has 2 Reflex Points, 2 Reflex, +2 Brawl, and 3 Hit Points.

The game is played in a number of rounds, and each round has three phases:

  1. Initiative
  2. Activation (Combat)
  3. Top-Up

1. Initiative

Each player rolls 1d10 for their gang. Each miniature can spend 1 of their 2 Reflex Points to add +2 to the roll. Play proceeds in order from the player with the highest total to the player with the lowest total.
Dice off for ties.

2. Activation

Each player then acts in initiative order and can activate their miniature. At the start of the player’s activation, their model gains a number of Reflex Points equal to the following equation:

Activation Reflex Points = (Remaining Reflex Points x 2) – 1

The minimum number of Activation Reflex Points a model gains is always 1.

To activate a miniature, you must spend a Reflex Point to make an attack.

To make an attack against an enemy model on the next pillar, you roll 1D10 and add your Brawl modifier. The target rolls 1D10 and adds their Reflex modifier. You can each spend a Reflex Point before you roll to add +2 to the total roll. If you equal or beat the target’s score, you have scored a hit. The target loses 2 HP.

Any model can interrupt another model’s attack to attack instead by spending 1 Reflex Point. The order is decided in the order of declared interrupts, so it’s possible for a model to interrupt another model that is interrupting it, the player only has to declare their interrupt after the interrupting player does, and spend the required Reflex Points to do so.

3. Top Up

After all the models have activated, each model that isn’t destroyed regains 1 Hit Point and up to 2 Reflex Points. A model can never have more than their starting amount of these points.

Winning and Losing

The first gang member to lose all 3 Hit Points falls off their pillar, and their opponent is the winner.


40 for 40 Sale

I turned the big Four Oh this month, and to celebrate we’re running a bunch of sales all month long.

40 for 40 promotional image
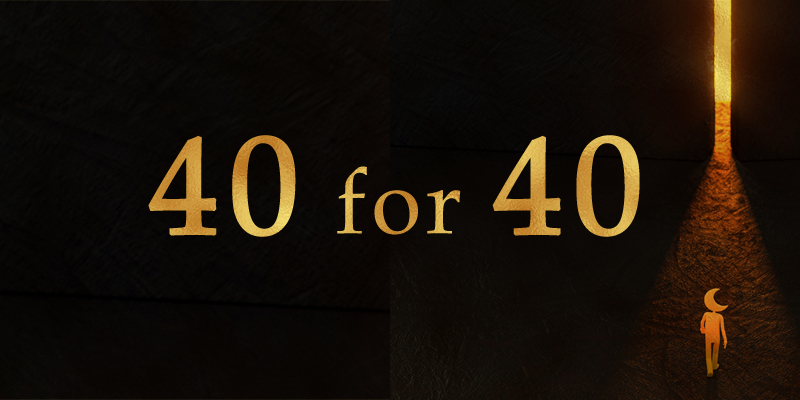
On our store, you can use the coupon code “40for40” to get 40% off your cart’s total value at checkout. You can use the coupon as many times as you like, until the end of the month.

Many of our products are 40%-off on Drive Thru RPG. This includes many titles for fifth edition fantasy, the Pathfinder Roleplaying Game, and stand-alone titles. We also have a few Pathfinder Second Edition and Starfinder Roleplaying Game titles.

On the DMs Guild we’ve got a massive bundle worth over $60 going for less than $16. This bundle includes many of our best-selling titles, so if you’ve bought them already you’ll pay even less to fill out your collection.


Build a Minis Game, Ep. 3 – Movement – MM 44

It’s Mini Monday, where I share customizing, scratch building, kitbashing, and miniature painting projects for your roleplaying and tabletop gaming. This week we’ll add movement to the skirmish minis game we’re building and we’ll try out a new prototype of the game. Mini Monday Logo Our little game is coming along, we’ll be half finished with writing it up by the end of this article.

Now, let’s consider how far minis move in our game. We also need to think about everything that affects movement, like terrain, and also the types of movement we’ll allow in Dagger Lords.

Episode 1: Concept and Theme
Episode 2: Initiative and Turns
Episode 3: Movement
Episode 4: Combat
Episode 5: Powers and Playtesting
Episode 6: Polishing the Game

We’re updating the public Dagger Lords game document as we go so that you can see the latest version of the game.

Dagger Lords Minis Game Logo

Actions and Free Activations

Movement might cost something — such as an action or activation point — or be free. There might be penalties (another cost) attached to movement, such as in Warhammer 40K, where some weapons can’t be fired if the model moves. In Pathfinder 2e, you have to take actions like a Stride to move, leaving fewer actions for attacking or casting spells.

Essentially, these costs are saying that it’s important for the player to consider if they’ll move or not, adding a layer of tactical depth to the game.

We might decide that everyone gets to move, and there’s no cost for doing so, but let’s consider our theme. We’re making a game about fantasy gangs fighting on the streets. It might seem great to let everyone move around for free, but then we’ll never have exciting moments wondering if a character shouldn’t have spent that extra action point.

We already mentioned Reflex Points, so why not use them as action points? I’m hoping we can build a more fluid game here than, say, Warhammer 40K or Age of Sigmar, and Reflex Points might be an ideal way to do that. We’ll get back to this in a moment.

Movement

“Float like a butterfly, sting like a bee. His hands can’t hit what his eyes can’t see.”

— Muhammad Ali

How far a model moves affects the game’s pacing. Short movement distances slow the game down, while too much movement will have units zipping around the table faster than bullets. In my gaming experience, most tabletop miniatures games at 28mm scale average around 5 inches of movement per move. Double that for a run. Let’s go with 6 inches for a faster game. That’s the benchmark, and some units will be slower, others will be faster. We can always tweak this value later, but let’s not waste time figuring that out now, I want to play.

Running

In our last version of the game, our first prototype, a model could move twice if they wanted to run. Let’s formalize this a bit more by nailing down how we want to use Reflex Points. In the prototype, you were effectively getting two free Reflex Points when your model’s turn happened. You could move, attack, or do either twice. What if you got a free Reflex Point when your turn happened, but you could still spend Reflex Points outside of your turn. However, your Reflex Points would do far more during your turn. Effectively, we’d be incentivizing saving your Reflex Points for your turn.

This sounds complicated though. I’m sure we can simplify it.

What if your turn multiplied your Reflex Points. You didn’t need to spend them during your turn even, you could wait to interrupt another player, but because your turn had happened, you got a big reward. To be safe, we could double your Reflex Points and subtract one.

Turn Reflex Reward = (Reflex Points x 2) – 1

Are we making it too complex again? Maybe, but this seems like a good time to stop and try things out.

Dagger Lords — Prototype Game: Paint the Town Red

In this small tester game, the object is to paint your opponent’s minis before they paint yours. If you want higher stakes, turn the paintbrushes into vorpal daggers that send their victims to another plane. The point is that we’re concerned with moving and turn order here, combat is a super simple, one hit, one kill affair, so we can focus on the mechanics we need to test now.

Setup and Rounds

Each player controls 3 gangster miniatures, with the player representing the gang boss. A game can have up to six players. Any miniatures can be used, and for these rules, only close combat weapons are considered because of powerful magic influencing the battlefield. Each mini has 2 Reflex Points and 3 Hit Points.

The game is played in a number of rounds, and each round has three phases:

  1. Initiative
  2. Activation (Movement and Combat)
  3. Top-Up

1. Initiative

Each player rolls 2D6 for their gang. Each miniature can spend 1 of their 2 Reflex Points to add +2 to the roll. Play proceeds in order from the player with the highest total to the player with the lowest total. The player with the highest score regains 2 Reflex Points to share among the models in their gang.
Dice off for ties.

2. Activation

Each player then acts in initiative order and can activate their miniatures, one after the other. At the start of the player’s activation, each model in their gang gains a number of Reflex Points equal to the following equation:

Activation Reflex Points = (Remaining Reflex Points x 2) – 1

The minimum number of Activation Reflex Points a model gains is always 1.

To activate a miniature, you must spend a Reflex Point and can do any of the following:

  1. Move up to 6 inches
  2. Make an attack

To make an attack against an enemy model within 2 inches of your model, you much roll a 4, 5, or 6 on 1D6 to hit. If your attack hits, remove the target from the game — they’ve been painted red.

Any model can interrupt another model’s movement to perform one action from the list above by spending 1 Reflex Point. The order is decided in the order of declared interrupts, so it’s possible for a model to interrupt another model that is interrupting its turn, the player only has to declare their interrupt after the interrupting player does, and spend the required Reflex Points to do so.

3. Top Up

After all the models have activated, each model that isn’t destroyed regains 1 Hit Point and up to 2 Reflex Points. A model can never have more than their starting amount of these points.

Winning and Losing

The last gang with any remaining models in it is the winner.

Image credit: Yuri_b

More Movement Rules

We don’t want to get too big, but we need to be sure we cover enough situations to make the game complete. Following are a few more rules you can add to the prototype. Try coming up with your own rules to replace these, or cover instances I didn’t think about, then let us know what you came up with in the comments.

Jumping

A model can jump 1” up and 1” forward, once, for every 4 inches they move. Effectively this lets a model clear three 1” cubes if they run, for free.

Vaulting

A model can vault over a 2” obstacle, once, for every 6 inches they move.

Flying

Most use one of two methods for flying: minis can “hop” and must land at the end of each movement, or they have a height indicator, which might be constant or incremental.

Let’s think of our theme again though. We’re making a street-level skirmish game, so flying doesn’t make much sense. At most, we’d expect a few characters to drop from rooftops or fly magically for a short distance, but there’s no room for wings between tall buildings, and anyone flying would have to be low enough to avoid cables, so we’ll skip flying for now in our minis game.

Creeping

Since interrupting is a major mechanic, having a way to counter an interrupt becomes invaluable, and fun. Let’s add a creeping mechanic:

Creeping is a move action, requiring a Reflex Point, but you move half your movement, rounded up. If a model is creeping, it can’t be interrupted by a model that can’t draw a line of sight to it. Creeping must be declared at the start of the action.

Climbing

Moving up an incline greater than 45 degrees reduces your movement to half its normal distance. In our prototype, this means models can climb 3 inches.

That’s it for this week’s go at building a minis game. Remember to check out the game and let us know if you have any other ideas to improve on it.


Apothecary Class — New D&D 5e Release

Our newest D&D class is an alternative option for the bard: the Apothecary. This class is all about healing and buffing allies by supplementing cleric spells with healing abilities in the form of potion-like concoctions.

As a special offer, we’re giving away 10 copies of the PDF for free, on condition that you’ll play the class during your next D&D session. Sound good? You can grab the book here.

40 for 40 Sale

I’m turning the big Four Oh this month, and to celebrate we’re running a 40%-off sales on many of our products on Drive Thru RPG.

40 for 40 promotional image

Let’s Build a Miniatures Game, Ep. 1 – MM 42

It’s Mini Monday, where I share customizing, scratch building, kitbashing, and miniature painting projects for your roleplaying and tabletop gaming. This week we’re building a miniatures game!

Mini Monday Logo

We’ve been building up to this.

I’ve always got a few game projects on the go, like my private He-Man boardgame expansion, but I thought it’d be fun to build a game. With you. We’ll be building a small, miniatures agnostic skirmish wargame, and hopefully it’ll inspire you to build your own.

How’s this going to work?

Each Mini Monday we’ll look at a different aspect of the game. We’ll look at many game design concepts and practices, and get our hands dirty with some prototype games. I’ll present a few ideas, pick the best of them for our game, then discuss why I think they’re great.

Sound off in the comments with your own ideas and feedback, and I’ll do my best to reply there and work the best ideas back into updated versions of the game. It’s also possible that you’ll only see these posts well after we’ve moved on, in which case you can follow our process or modify our results to make your own game.

Here’s a breakdown of what we’ll cover in this series:
Episode 1: Concept and Theme
Episode 2: Initiative and Turns
Episode 3: Movement
Episode 4: Combat
Episode 5: Powers and Playtesting
Episode 6: Polishing the Game

As we go, we’ll update a public document so that you can see the latest version of the game.

Concept and Theme

If our concept is to build a small, miniatures agnostic skirmish wargame, then we’ll need a theme to support that.

Our theme could be anything, like monkey pirates with banana grenades, or humans surviving in the grim darkness of space, but none of those ideas are worth pursuing if it pulls us away from our initial concept, unless we’re okay with changing it. For now, let’s assume the concept is rock solid. So we can’t build a Warhammer 40,000 clone, because that’ll need too many miniatures, and a monkey pirates game will need some very hard-to-find monkey pirate minis. Those themes would pull us away from our concept.

I like the basic premise behind Necromunda: gangs fighting it out in a massive hive structure. Gangs are easy to find miniatures for since they could be humans, aliens, robots, mutants, or even undead.

We could flip this on its head to get our own concept: You’re a fantasy crime lord fighting a bitter turf war.

Hey, that even gives me an idea for a name: Dagger Lords.

The theme of gangs of fantasy creatures supports a miniatures agnostic game and doesn’t need to get any bigger than 2-3 minis on a side. It screams Dickensian characters with a fantasy twist, or maybe a Steampunk, Peaky Blinders inspired skirmish game, but with goblins and scummy elves.

With that, we’re on our way to building a miniatures game!

You can check out what we have so far by clicking on the button, which will take you to the Dagger Lords working document. There’s not much there yet, but we’re just getting started.


Beast Man, a MotU … Miniature? — MM 41

It’s Mini Monday, and this week’s project is Beast Man, Skeletor’s beastly right-hand gorilla. That’s right, we’re diving into some Masters of the Universe flavoured miniature projects.

Mini Monday Logo

Hello Heroes!

I’ve got a dark little secret. Don’t tell anyone, but I’m building a game … just for myself. I know, right, not much point in being a game designer and then making a game you won’t sell. Madness!

The game is a Masters of the Universe themed expansion for the Dungeons & Dragons Adventure Boardgames, the same games that Yochlol and those skeletons we’ve featured so often come from. So far it’ll include four new heroes, including He-Man, and 52 cards featuring the most iconic enemies, heroes, and magical items from the MotU franchise.

He-Man D&D Boardgame
* See The Fine Print

And of course, this game’s most definitely not for sale or distribution, is very much unofficial, and not something any lawyers should get worked up about. I’m making it just for myself.

Tung Lashor Monster Card
* See The Fine Print

Beast Man, Skeletor’s homicidal orangutan, is the first custom enemy miniature I’ve made. It was my most satisfying build yet!

Riso rindo risa GIF - Find on GIFER

Building Beast Man

I converted Beast Man from the Reaper Bones Ogre Chieftain. I’d been scouring the Interwebs for minis to convert into Evil Warriors, then realised I had this guy sitting on my shelf. Sometimes the hobby stars align and a project falls into place as if the Universe willed it into being. Inspiration is a fickle thing, but when it hits, the results can be so satisfying. The Chieftain turned out to be a perfect mini to turn into Beast Man.

The shin guards, spikes, head crest, and Beast Man’s hunched, hairy back were all made from modelling epoxy. You could use green stuff instead.

The rest was painting, and then he was done.

Beast Man MOTU Miniature
“Of course, Master, I’ll take care of He-Man.”

The Next Level

You can probably keep fiddling with a mini forever, and I’ve already got some ideas to take Beast Man a few steps further.

I’d like to add some greenish-grey to the fur of his loincloth and under his shoulder pad. I’ll also add greenish rust to the copper disk, bracelets, and shoulder pad. These additions will add contrast, which is why Beast Man has blue undies in the animated show — now you know.

Beast Man is often shown with blue face paint, and the base could use a light grey dry brushing.

Lastly, I’ll add a chain. Beast Man always had a whip, but a chain would be a great substitute and suggest the cruelty he’s capable of.

Cast Your Vote

Who would you like to see next? I’ve got Evil-Lyn, Battle Cat, and Prince Adam in the works. Cast your vote in the comments below.

The Fine Print

We don’t own the Masters of the Universe, or the D&D Adventure Boardgame, or any right to publish content related to the characters or look-and-feel of either IP.  What you see here is provided for identification purposes in conjunction with the discussion of the topic of the article. 

DIY PJ Masks HQ! — Mini Monday #40

It’s Mini Monday, and this week we’re going to do something completely different. I’ll show you how to make the PJ Masks HQ, impress your kids, win fame and glory, and do it all on the cheap!

Mini Monday Logo


Hello Heroes!

My post about DIY Gaming got me thinking that I could do a whole series on crafting your own games. I freakin’ love it! Make a game just for yourself and — if you’re lucky enough to have some — your friends? Nobody else, no fans, no gaming clubs? No big budgets for art or marketing. No Kickstarter campaign. Just you, the cardboard, and a few dice. Sign me up!

But that’s for the future. And now, as Mr. Cleese would say, “for something completely different.”

Let me tell you something, jackass! — Monty Python - And Now For Something  Completely...

The PJ Masks HQ

If you’re here, you know what the PJ Masks are all about — or you’re hopelessly searching for an RPG angle to this article! My kids love the pajama-wearing heroes and were lucky enough to get some of the action figures for Christmas. Dad here — overzealous idiot that he is — decided the toys needed a home. It wasn’t like Dad needed to do actual work or anything. Besides, the PJ Masks HQ is just a pipe with wings and funny ears… what could be so difficult about making that?

PJ Masks HQ Front

How Not to Lose a Finger

Sawing PVC pipe in half is easy. Cutting square holes out of PVC pipe without sacrificing an appendage requires the dexterity and nerves of a bomb technician.

I started with a thick PVC pipe and marked out three “doors” for each of the heroes’ rooms.

PJ Masks Tower PVC Pipe

A hand saw will get you started, but gets messy. The trick is to cut many horizontal lines — top to bottom in the picture above — while sawing over a bin. You can then use a drill to cut off these thin sections, and a vacuum cleaner to pick up all the white dust that misses the bin. Repeat until you have enough space to use your saw vertically, which is left to right in the picture.

Finish off the holes with a file and sandpaper.

On a Wing and a Pr(Ear)

I formed the ears with the sections I’d cut from the holes, forming them with my saw, file, and unwavering determination. We don’t need to mention the leg wound incident. It’s not important. Move along!

The wings were made from hardboard, more sawing, more filing, and even more cursing. The fact that Jesus never used the swears he picked up from papa Joseph just proves his divinity, let me tell you.

The wings and ears were then glued to the main pipe of the tower with PVC cement. It’s miracle stuff, and considering how often the darn pieces were smashed off, I can tell you it’ll get you as high as a bat, but it works.

Next Floor, Lingerie and PTSD

The floors and roof were made with the bottoms of tin cans, hot glued into place. A tin opener will get this job done, but there must be a better option. There must be. I still have nightmares about sawing, puncturing, drilling, bending, scoring, and doing whatever else I could to get the darn things off.

Making Faces

Each of the faces on the front of the tower were drawn on cardboard and cut out. I did the same for the detail on the wings. At this point I also superglued foil onto hard, clear plastic to make the eyes, which were stuck onto the PJ Masks HQ at the end of the build.

Painting

Miniature painters, beware. A creation this size takes a lot of paint. I’ve suspicions that PVC is really just dense sponge. I threw five cans of paint at this, and it still seemed to want more!

I painted the faces and the wing details with poster paints, then, when everything was dry, stuck on the eyes. I then used a permanent marker around the eyes, faces, and wing detail. Finally, I painted the whole thing with gloss varnish.

Then I stood weeping as my kids ignored this magnificent new toy and played with the cheap tealight I’d planned to install in the HQ’s ceiling. (Stick a magnet to the base, so it’ll stick to the tin ceiling like a spaced-out bat).

The final thing was an impressive abomination, like a kiddy version of Sauron’s tower. The symbolism isn’t lost on me.

PJ Masks HQ Front

PJ Masks HQ Back

More Occult Misadventure

And now for that RPG angle. Masters of the Occult: Play Manga d20 is the perfect companion to the best-selling Play Manga d20 ruleset, which builds on the Pathfinder Roleplaying Game.

Inside you’ll find archetypes and options for the occult classes, based on popular manga and anime franchises.

Open your mind to the possibilities of the world beyond the veil of reality!

Masters of the Occult: Play Manga d20


Toys as Minis, a Boost for Your Table — MM 39

It’s Mini Monday, where I share customizing, scratch building, kitbashing, and miniature painting projects for your roleplaying and tabletop gaming. This week I’m going to tell you why you should use more toys as minis.

Mini Monday Logo

I figure that tabletop gamers fall into two groups; those who supplement their mini collection with toys, and those who hate the idea. If you’re in that second camp, it’s probably because you think that toys just don’t look right on the gaming table. I was one of the haters too, but I changed my mind. Here’s why!

Toys as Minis
Most of these are from Japan, but I found the bear locally.

Hidden Treasures

There’s a lot of junk out there, but search hard enough, and you just might find the perfect additions to your collection. I found that toys from Japan can be particularly good, and tend to be on the smaller side, but keeping an eye on your local cheap or second-hand toy shop will pay off eventually, especially if you’re in a biggish city.

Lots of folks online have shown off their dollar store hauls, so that’s an awesome option if you have cheap shops like that in your area. You’re most likely to find animals and mythical creatures such as dragons, but you never know what might turn up.

Two other great sources for toys for minis are your own toy collection and second-hand sales. Such sources usually have a varied collection of toys to choose from, are dirt cheap, and might surprise you with what you’ll find.

Kitbashing and Converting

If you’re ready to do some converting and kitbashing, then toys offer a veritable gold mine of options. Some hobbyists on YouTube recently did a toy monster mashup, go search it out if you’re looking for more inspiration.

Price

With some exceptions, toys are generally a lot cheaper than specifically-produced miniatures, and printing takes time. It’ll take time to find the right toys, but you can usually search while looking out for other things.

The Buying Strategy

Patience and a will to shop around are the keys to success if you’re going to use toys as minis. Buying a couple of odd-looking horses because you need horses for Friday’s game might be fine, but you’ll quickly collect a lot of ugly minis that way.

Rather, keep a list of what you want minis for and play the long game, buying only the best of the best.

Toy Traps to Avoid

Avoid buying online, unless you can find a good size comparison for the toy. Also, avoid cheap-looking plastic, as this can become brittle over time and break easily. Thin plastic is usually the biggest clue, but strange colour changes in the plastic can also give you a hint that the toy will be more hassle than it’s worth in the long run.

I hope this inspires you to start adding some toys to your mini collection. If you have more collecting tips to share, then throw them in the comments below, we’d love to hear from you!

Scratch Build Tank Tracks — Mini Monday 37

It’s Mini Monday, where I share customizing, scratch building, kitbashing, and miniature painting projects for your roleplaying and tabletop gaming. This week we’ll look at how to scratch build tank tracks for your Orks, Adeptus Mechanicus, or that home-made Baneblade you always wanted to make.

Mini Monday Logo

Why Scratch Build Tank Tracks?

There are a lot of options when putting together a mini, especially these days. I’m making a Mek Gun, so I could buy Games Workshop’s official Warhammer 40K miniature kit, buy parts from a custom parts store, find a model to 3D print, modify a WWII field gun kit, or scratch-build it. So why choose scratch building?

  1. It takes more time to get the same sort of end result you’d expect from anything made professionally, but it’s very rewarding when you do.
  2. Scratch building will teach you so much more about kitbashing, miniature conversion, and model making because it forces you to use that squishy organ between your ears in new ways.
  3. It’s a great way to create miniatures that just don’t exist, or that are too expensive.

For me, I simply wanted to know that I could do it. I love the Grot Tanks I’ve seen the community creating, so making a tracked Big Gun seemed like a good challenge.

Let’s Build It!

Scratch Build Tank Tracks 1
Read-side view of the wheels, track base, and track plates.

Here’s my process:

  1. Use pipes to form the basic shape of the treads and hull. Use thicker pipes as the main wheels, with small wheels as the guide wheels. Glue them together with supports (that black bar in the picture above connects the top three pipes).
  2. Glue sections of pipes over and inside these pipes to build up the wheel hub’s shape. I used lots of dead pen and marker tubes for this part.
  3. Add extra detail, such as shock absorbers. See Adding Springs below.
  4. Glue strips of thick craft foam around the wheels. You can find adhesive craft foam to make this a little easier.
  5. Cut rectangles of cardboard and glue them onto the foam. My strips were about 8 mm by 5 mm, bent two-thirds of their length to hide the craft foam. Glue a few of these on, then let them dry, otherwise it gets tricky trying to stop everything moving around as you work.
Scratch Build Tank Tracks 2
View of the left side of the scratch built tank tracks.

Adding Springs

You can add shock absorbers by putting a spring over a pipe that runs between two of the pipes that form the wheels. Details like these really bring the mini together.

Scratch Build Tank Tracks Spring

Here’s the final mini, bar some extra details and the gun crew.

Mek Big Gun 1

I hope that inspires you to scratch build some of your own machines for the tabletop.

Hello, My Name is Death

Our new, poker-based tabletop RPG, Hello, My Name is Death is out now! Outdo your friends, reap souls, and become the next #OffiialGrimReaper in this zine RPG.

Hello My Name is Death


How to Pick Colours for Mini Painting — MM 36

It’s Mini Monday, where I share customizing, scratch building, kitbashing, and miniature painting projects for your roleplaying and tabletop gaming. This week we’ll talk about how to pick colours for mini painting with colour theory.

Mini Monday Logo

Pick colours for your mini painting projects thoughtfully, because it’ll give you a better end result, and, like painting, it’s a skill you can improve on. Build some understanding of the theory, then use that to inform your choices and achieve the results you’re looking for.

Colour Theory

Colour theory might seem like a deep rabbit hole, which may seem intimidating, but I highly recommend you dive in. Colour theory opens up the language of colour, an understanding of how colours work together, and an understanding of the emotional responses that colours can create.

Here’s a quick look:

The colour wheel below shows the primary colours (red, blue, and yellow) and the secondary colours (orange, purple, and green). You can make the secondary colours by mixing the two primary colours nearest to the secondary colour you want to make (and that’ll cost GW some sales).

How to pick colors for your mini painting.

Analogous colours sit side-by-side on the colour wheel. They give you a simple range of colours for creating rich monochromatic (single colour) colour schemes.

Complementary colours sit opposite each other on the colour wheel, but still work well when paired together. As you can see, there’s more to the “red wunz go fasta” thing when painting Orks.

This is just scratching the surface of colour theory, and I encourage you to seek out more information.

3 Tips to Using Colour Theory

Like any theory, you need to put colour theory into practice to get a real understanding of it and make it stick. Here are three ways to help yourself implement colour theory in your miniature painting.

Limited Your Colour Scheme

I painted the mini below with two reds, two browns, black, white (mixed to make grey), and metallic paint. It is a simple mini, but restricting your range of colours forces you to get more creative. Using analogous colours for this type of painting will also give you a base colour, shading colour, and a highlight that compliments each other.

How to pick colors for your mini painting

Another way to think of it is to drop a primary colour or two. Forbid yourself from using it, and see how your colour scheme becomes much tighter.

Clash Your Colours with Purpose

If colours are not analogous or complimentary, then there’s no colour harmony; they are contrasting colours. That doesn’t mean you can’t use purple and green together, you just have to know why you’re pairing them. Think of the green Hulk with his purple shorts, or Superman with his red and blue spandex, they stand out. And sometimes standing out is exactly what you want.

A World in Black and White

Of course, real life is full of colour, but to really understand and successfully pick colours for your minis you could do worse than follow Frank Miller’s example in Sin City. Frank’s masterpiece is a master class in light and shadow, with pages in black and white and only occasional splashes of colour. You can explore this with nothing more than paper and a black pen.

As an example, here’s the cover of The Grimdark Pamphlet, which I thought was a good colour choice for a book of game options that challenges the often black and white world of most adventurers, where the good guys are good and the bad guys are bad. Or was it that I didn’t want colour so I could push the idea of the colourless, grim aesthetic most associated with grimdark settings?

Grimdark Pamphlet Cover

Now, I’m not saying you need to paint a mini only black and white, but there are plenty of great paint schemes that focus on black and white, such as drow with their white hair and black armour, the Black Templars, the Blood Angels Death Company, and Goff Orks. Notice how these schemes often use a third colour to accentuate items such as weapons.

You can take this idea further to explore light, as Miniac did in his Color is for CHUMPS video. Check it out and tell him I sent you.


Building Ork barricades from Trash — MM 35

It’s Mini Monday, where I share customizing, scratch building, kitbashing, and miniature painting projects for your roleplaying and tabletop gaming. This week we’re building Ork barricades from Christmas trash.

Mini Monday Logo

Ah yes, the dust has settled after the strangest Christmas and New Years’ Eve in living history, and 2021 is picking up steam. Time to make something, and what’s better than recycling that Christmas trash to make something Orky. Of course, you might already have recycled/trashed/incinerated/buried the last signs of the festive season, but you’ll always generate more waste, so let’s go!

Da orky chant - Ork barricades
“‘Er we go, ‘er we go!”

Ork Barricades

These Ork barricades are similar to the ones you can get in the Mekboy Workshop, or the barricades Games Workshop used to sell as a terrain pack, but they’re very easy to build yourself using nothing but bits of scrap cardboard and plastic.

I cut out 6-inch strips of cardboard, then glued bits of cardboard and plastic onto them. That’s basically it. We’re done.

Okay, but seriously, there are a few tricks to making this look good:

  1. Cut the cardboard and plastic sheets at angles. Bend them and add damage like cuts or bullet holes to make them look even more Orky.
  2. Stick the sheets down at angles, leaning on each other. This gives a sense of three-dimensionality to the terrain and makes it stronger. Orky things are always off-kilter.
  3. Cut out “teef” of card to decorate the terrain.
  4. Cut tiny squares of plastic to make Orky rivets. I use those little plastic tabs that hold bread bags closed. Cut them into strips, then squares, then superglue them onto your model.

Ork barricades 1

Ork barricades
A wall with “teef” to show that the boyz own it.


Painting

I used a heavy-duty red primer to make the models more resistant to wear and tear. I then painted the “metal” sections black or stippled orange onto them. I also left some unpainted. I then dabbed brown onto the orange sections with a sponge to make them look rusted. I then dry brushed the edges of the models with silver paint and put a black wash over the whole thing to finish it off. The ground was painted dark gray and dry brushed light gray.

Just be sure to let your Ork barricades dry between coats. I had to redo a bunch of dry brushing because I was getting too happy with the brush, which just blended everything together. Patience, young grasshopper, patience.

And that’s it.

Ork barricade doorways
You can even make doorways to take little junk doors.
Ork barricade doors closed
And here they are again, with the doors closed.

The best advice I can give is to give it a try. I was skeptical about how good the cardboard would look, but in the end, I was very pleased with how they turned out. The only thing I’d change is that I’d base them on tongue depressors or hardboard instead of cardboard.


RPG Leveling is Broken — Why Levels Suck

RPG leveling is broken. And yes, I’m looking at you, Dungeons & Dragons and Pathfinder 1 and 2.

First off, thank you to Plastic Polyhedra for hosting this month’s RPG Blog Carnival, to which this topic relates.

RPG Levelling is Broken
Image by Esteban Sayhueque

The Problem with Levels

Here’s my gripe:

In real life, but even more importantly, in stories, characters grow in ways that have nothing to do with their skills and abilities. Think of most comic book heroes. They generally have a set of skills that don’t improve during the course of their adventures, though they might get better control over their powers over time. There’s not much story in abilities. Rather, characters face personal challenges that grow their personality… their character.

Now, I get that gaining power is fun, but it’s false fun. Gaining an extra attack, just because I’ve reached level 5, doesn’t make my character stand out from other barbarians. Reaching level 15, just so I can kill level 15 monsters, isn’t real growth, it’s just gated content. Bilbo didn’t gain a new feat that enabled him to sneak past Smaug. He had a magical ring for that!

Character Building is not a GM’s Prerogative

The GM can offer chances for a player’s character to grow, but ultimately that isn’t the GM’s job. The GM’s job is to stoke the fires of the furnace that will forge the character’s character, and the player’s the blacksmith.

But the mechanics can help.

A Few Solutions

Leveling up in D&D or Pathfinder type games could, with a few rules tweaks, be more meaningful. We won’t even throw out the core rules, I promise.

Your character should change in a meaningful way during their adventures, such as gaining new flaws, changing alignment, become more set in their current alignment, developing a new phobia, or seeking to accomplish new goals.

A ton of RPG systems already implement mechanics for these. The Mouse Guard RPG and Cortex both used a system similar to 5e’s flaws, ideals, and bonds, but they change very frequently and are linked to how you gain experience. This isn’t a new idea.

Encourage your players to play to their flaws, ideals, and bonds, or to hooks linked to their alignment, and offer them experience for doing so. How much you offer them is your dial; turn up the roleplay by offering more, or turn it down and focus on traditional advancement by offering less. Then, when a character levels up, force them to refine their flaws, ideals, and bonds, or add new ones. Encourage them to be specific.

Get your players more connected to their character’s story, because feat or skill choices aren’t meaningful decisions.

Image by Ubergank

The Grimdark Pamphlet

The Grimdark Pamphlet offers new ideas and rules for taking your Dungeons & Dragons fifth edition game to darker places, where your choices matter and death is a real threat. We update the book from time to time with new rules, so your once-off purchase gets you a growing repository of rules and GMing advice. It also includes information on joining our playtest.

Grimdark Pamphlet Cover

Till next time, Be The Hero!